

Whether you are designing a new home or renovating the existing one; installing a vinyl replacement window may be an essential part of the process. Some people invest a huge amount in hiring professional installation experts for these windows. But in actual, one can complete this task with ‘do it yourself’ procedures just as well.
It is possible to install vinyl replacement glass windows by using some basic tools and materials. However, if you are new to this task, the chances are that you are looking for some professional guidelines to execute it. We advise you to go through the details below. Here we have provided all essential details about tools and materials along with a step by step procedure to install vinyl replacement glass windows.
Tool required for installing vinyl replacement windows:

- Utility knife
- Safety glasses
- Cordless drill
- Hearing protection
- Caulk gun
- Tape measure
- Pry bar
- Level
- Hammer
Essential materials for installing Vinyl Replacement Windows:
- Shims
- Insulation
- Acrylic caulk
- Foam backer rod
Installing Vinyl Replacement Glass Windows:
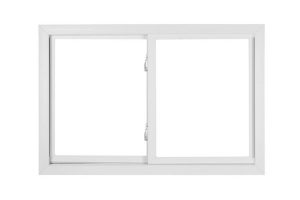
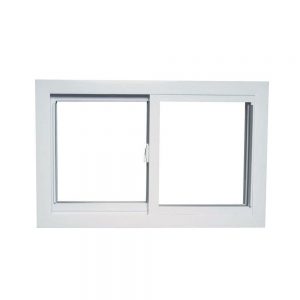
Vinyl Replacement glass windows are one of the best value additions to your traditional and modern home. There are generally two common choices for window improvement; you can either go for full-frame window option or pocket replacement windows. Both of them offer great appeal to the entire structure. However, here we are going to talk about the full-frame replacement window option and how to execute this task.
In case if you are planning to insert new vinyl windows at your home; some expert tips may help you in this regard. Prefer to go through the detailed steps below to complete this task; even beginners can follow these instructions with ease.
Step by step installation of vinyl replacement glass windows:
Step 1: Know your window replacement parts
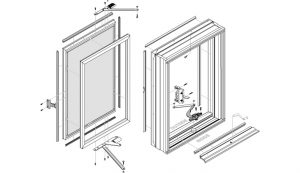
It is difficult to execute any task without knowing the specific parts of a window. One needs to understand which parts play an essential role in carrying out the replacement. Note that, replacement windows, as the name indicates, are designed to fit into the existing openings in the windows. You can find them in variable size ranges; the range starts from 11 ½ inches to a maximum of 68 inches. These windows can be made up of many different materials such as aluminum-clad wood, vinyl-clad wood, fiberglass, vinyl, and wood as well. The vinyl replacement windows are considered as the best solution for all modern and traditional structures. They ensure sturdy and catchy appeal in the long run. On the other side, full-replacement windows have a complete frame including sill, side jambs, and head jamb.
Step 2: How to measure vinyl replacement windows
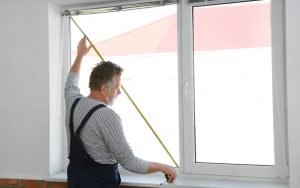
First of all, you should start by measuring the interior height and width of the window frame. Make use of a measuring tape and jot down the measurements accurately from top to bottom and side to side. It is important to cross-check your measurements to ensure that you do not end with imperfect window size. Some people simply try to follow the dimensions of their old frame to design a new vinyl window.
You should use retrofit window installation measurements for buying new vinyl windows for your home. Note that the price of the product keeps on varying depending upon the manufacturer and special features. Experts advise finding insulated glass windows as they are a sturdier and durable solution to every home.
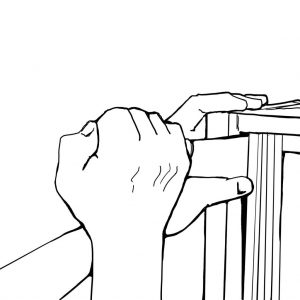
Step 3: Remove the old window sash
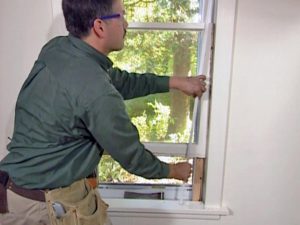
It is now time to remove the old sash from your existing window frame. In most of the cases, it is important to unscrew the wooden stops from the inner portion of the window frame. In case if you want to reinstall the same stops again, make sure you remove them more carefully, without breaking them. Now you have to free the upper sash and to do this you can remove the parting beads first. In case if the windows are fitted using sash replacement kits earlier, the beads will be missing. Simply press jamb liners and then pull the top portion of the sash. After that, take out the sash by moving it in the upward direction.
Step 4: Pry off the window jamb liners
In case if the frame of the window was fixed using aluminum or vinyl jamb liners; you may need to use a flat bar to remove them. Make sure you remove all wooden stops from the target window frame. Just leave the exterior and interior casings intact.
Step 5: Prepare the frame
The next important task is to scrape off the loose and blistered paint so that you can give it a new look with the finer appeal. The cracks and holes must be patched with exterior-grade putty. Prefer to use a good quality product to ensure long life service. It is time to sand the window jambs smooth, and then paint surfaces. In case if you find the old sash weights on the frame, prefer to remove them now from specific pockets.
Step 6: Get ready with installation

Most of the people prefer to use polyurethane foam for window installation. This material is believed to have enhanced abilities to block air as compared to fiberglass insulation. Experts advise using low-pressure models with minimally expanding foam; they are meant for doors and windows. Make sure you take away the existing fiberglass from the weight pockets. Now create a hole with 3/8 inches’ diameter; one must be in the middle of the window and two on the extreme ends. The same holes will be created on the head jamb as well as on the sill.
Step 7: Spray the foam into holes

It is time to shoot some expanding foam into window holes, and you can do it as long as it starts oozing out. Experts also recommend spraying foam into sash weight pockets that are located on the side jambs. Let it stay there for almost 6 hours and then cut the flush right before replacing the window’s sash-weight pocket panels.
Step 8: Caulk the window opening
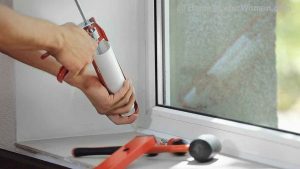
In order to install the window, it is important to apply some elastomeric caulk to the exposed inner face. At the same time, it must be applied to the blind spots present on the top as well as the side portion of the frame. Never forget to apply two continuous beads along the sill of the replacement window.
Step 9: Fix the window

Start installing the window by first fixing it from the inner side of the room. Set the bottom of the vinyl replacement window and then tip it into the opening. In order to fix it well, press the window tightly against blind spots and exterior casings.
Step 10: Fasten it gently
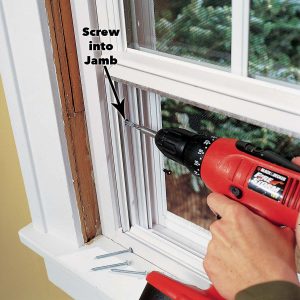
In order to fix the window, you should hold it at the right place by using a 2-inch screw. It must be driven loosely into the framing as well as to the upper side jamb. Make sure the screw is placed in such a way that it provides enough space for the window to operate. Finally, close and then lock the sash.
Step 11: Shim if required
You may need to adjust the unit by adding some shims below the sill as well as behind the side jambs. It is important to ensure that the window stays in the right place, and it operates smoothly. You can measure the diagonal dimensions of the window (corner to corner) to ensure it is the same as what you have measured in the beginning. If you have a square window, it must be screwed at the right place using predrilled holes. In order to avoid frame bowing issues, you can slip the shim precisely behind the jamb and then screw through shim. The shim flush can be trimmed using a utility knife.
Step 12: Make it ready

Check the window from outside to ensure it is installed perfectly. Measure the gaps available between the casing and the window frame. The gaps less than ¼ inch can be easily filled using elastomeric caulk. In case if the gap is wider, it must be stuffed using the foam-rubber backer road. From the inner portion, the gaps can be filled using expanding foam. Once you are done
with all these adjustments, it is time to prime and paint the window. Make sure it matches the required interior and exterior décor to ensure a perfect appeal.
In order to install a full-frame window, you may need to spare almost 4 to 6 hours as a beginner. However, experts can complete this task in lesser time as well. Make sure you use all tools carefully; avoid mishandling of equipment that you are unaware about. Other than this, prefer to use high-quality materials for installation so that your window can serve you for years ahead.
Installing a vinyl replacement glass window is the best way to enhance the overall appeal of the house. At the same time, it can protect you from the cold wind in the peak winter season. Beginners can follow these simple steps to install vinyl replacement windows at their home.


